We completed a comprehensive sound deadening install on a 79 series Toyota LandCruiser Dual Cab. You can see our detailed video of the install on our YouTube Channel (watch here) We applied our Premium Dual Cab Pack to 79 Series. We break the truck down into three areas; roof, floor and rear wall and the doors.
First step is to strip the interior. Once again, we have a video with some tips and tricks when removing the interior of a 79 Series (watch here). We treated the roof first. The preference in starting here is that we will be in the truck standing on everything when working on the roof so if it is striped there is no stress.
Once you have taken the headliner out, you will see the large expanse of single-skin sheet metal. A big drum. An analogy we use with sound vibrating in panels is that it is like a rock in the middle of a pond. Vibrations will ripple through the whole roof in the same way. Our aim is to stop the sound reverberating by adding weight via our Sound Deadening sheets.
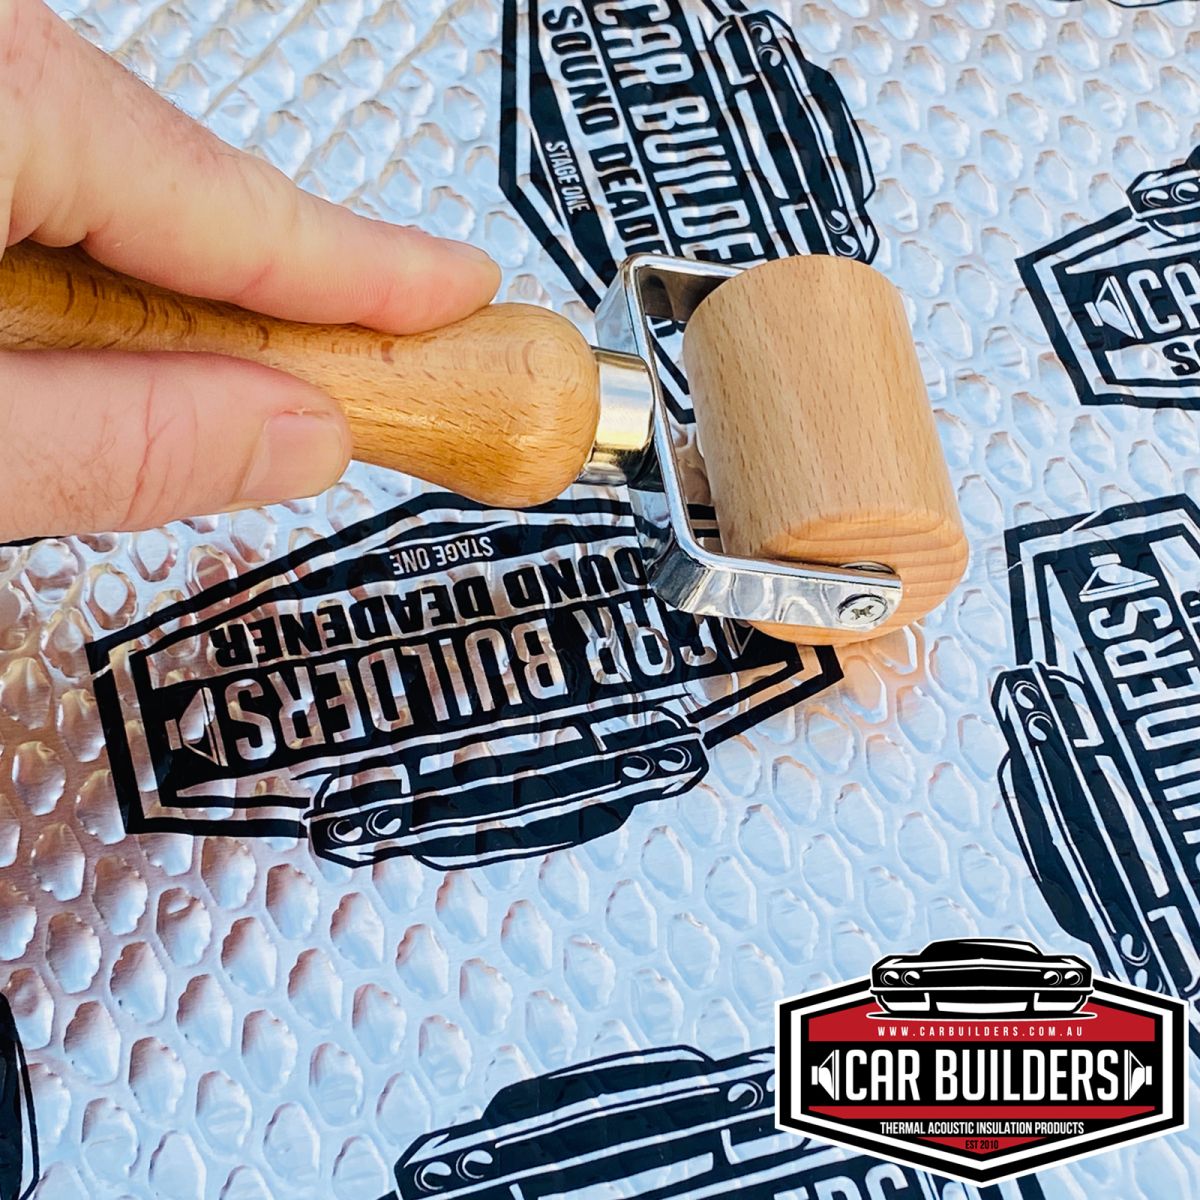
Firstly, we need to prepare the surface for the Sound Deadening sheets (and any ‘Peel and Stick’ product) by thoroughly cleaning it with a wax and grease remover to ensure that the butyl based sheets can make good contact with the roof and fully stick. We are then ready to apply the Sound Deadener to the roof. In all, 12 sheets (300mm x 500mm) or one 1.8sqm Car Builders Sound Deadener box will be use to cover the entire roof. Peeling back the paper backing to reveal the butyl, feed this onto the pre-determined area.

Use the application roller to apply an even pressure to the aluminium surface to ensure that the butyl is making consistent contact with the sheet metal. With swages in the roof you can use the handle of the application roller to push it down. It is important that when applying the Sound Deadener over two swages/ribs, don’t bridge it over as it will want to pop back up. Instead feed the Sound Deadener down into the valley so as there is more area required to be covered and it will stay in position once rolled down.
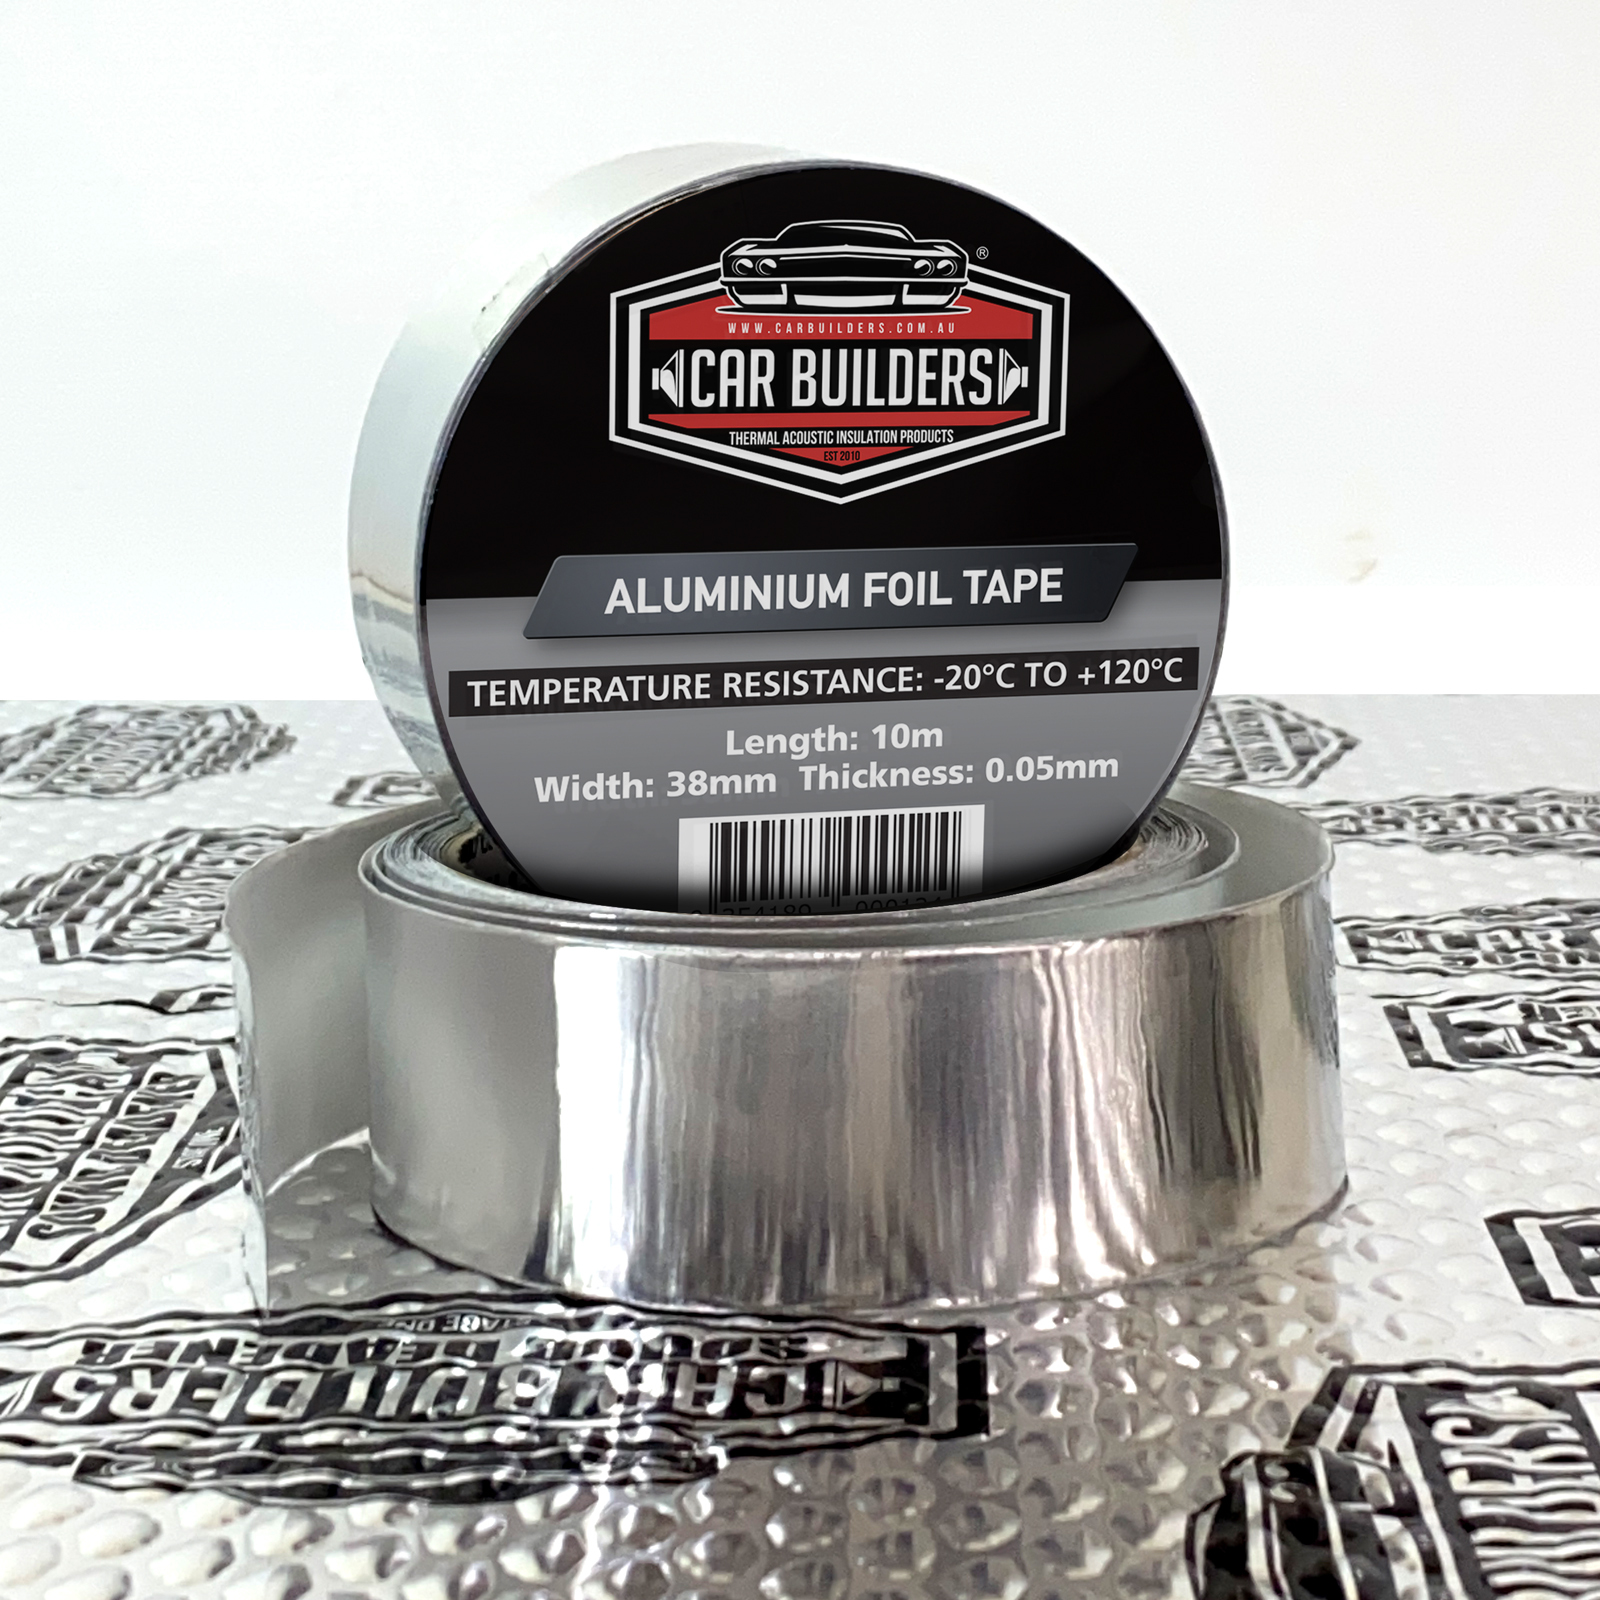
Using the Aluminium Foil Tape, we then join all the mats that are touching each other to create a consistent aluminium surface for our Insul-Layer 6mm closed cell foam, which will go on top. With a simple before and after decibel tap test, we found that there was an improvement of just over 9 decibels with the deadening applied.
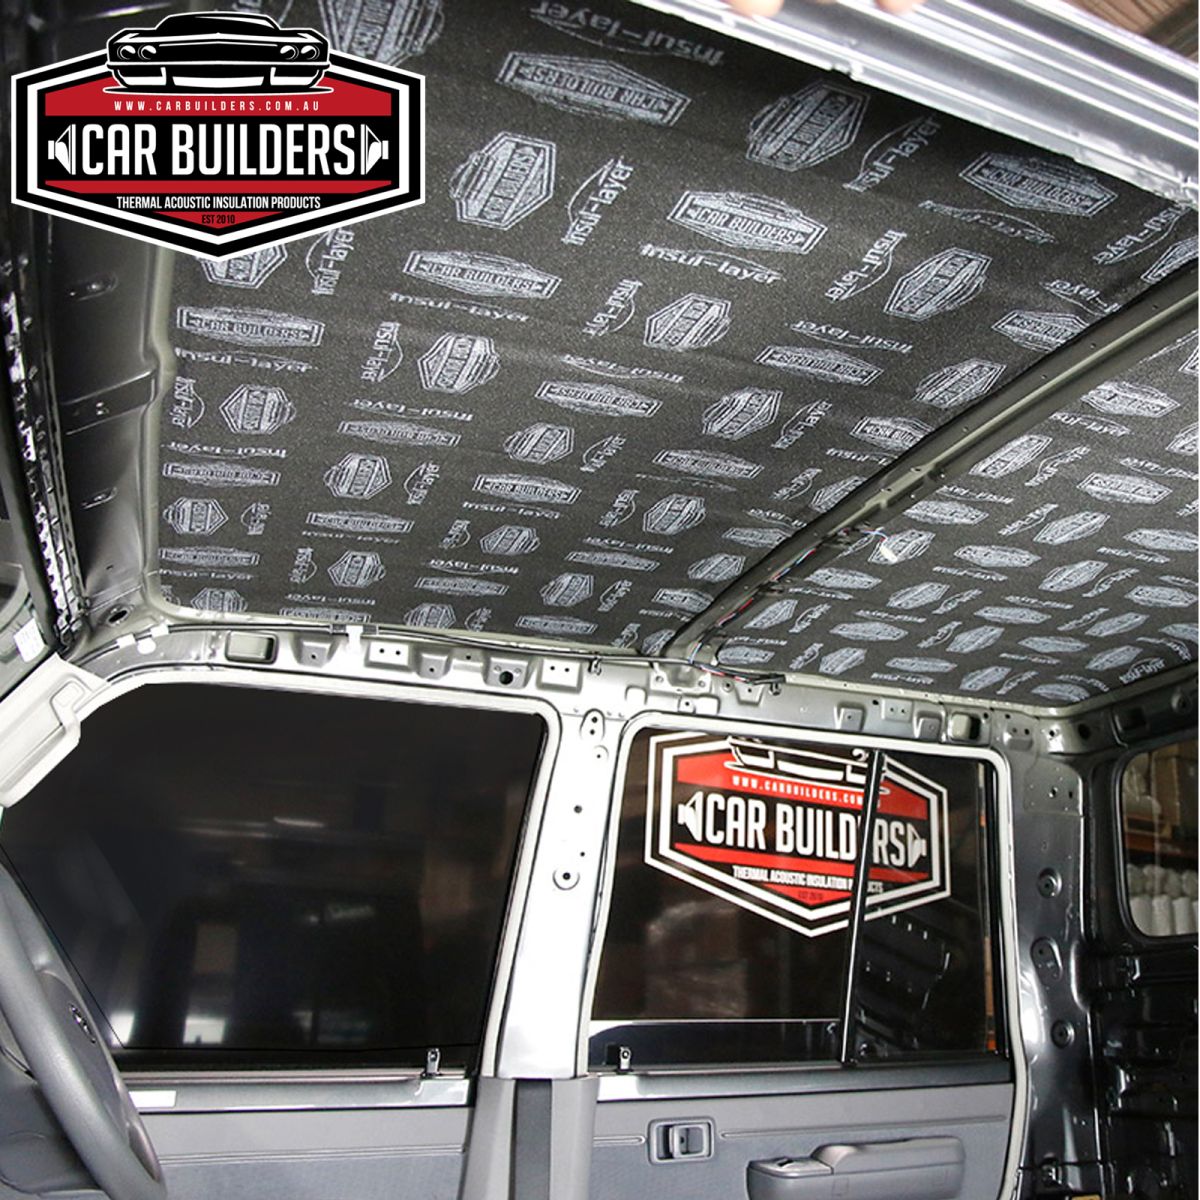
Insul-Layer 6mm is now ready to go onto of the sound deadening mats. This is a light weight thermal acoustic barrier that will not absorb water and is one of the most effective single layer materials to insulate against heat. This durable, closed cell synthetic rubber is effective as a decoupling layer, to isolate noise and vibrations. It has a peel and stick backing. We have designed the adhesive to be on the foam itself rather than on a paper-backing that will fail over time. It does mean that you need to careful in applying it as once it is down you will have to rip the foam to remove it.
One sheet of our Insul-Layer 6mm covers almost half of the 79 Series roof. Hold up the foam to the roof, lined up against the front window and the drivers side. You will find that the sheet will need to be trimmed where it meets the crossover on the roof (see below). This foam will be then used for when it falls sightly short along the passenger side.

Once you are confident where the Insul-Layer will go, slowly peel back and stick, we do this from the corner position. Like any peel and stick material, don’t stretch and stick, rather ensure the material is feed into valleys so it almost contracts and conforms to the shape. This is mean that it won’t have pressure on it to lift and you can be confident that it will have long lasting adhesion.
Part one done. Time to put the headliner back in and move onto the rear wall.
When sound deadening the rear wall, it is a good idea to form the sheets to the ribbed shape before you peel the back off to get an idea of where they are going to fit, as there will be brackets and the jack that need to be worked around. Once you have applied the deadening to the lower section you can also apply to above the top hat section (no need to do the top hat as it is solid).
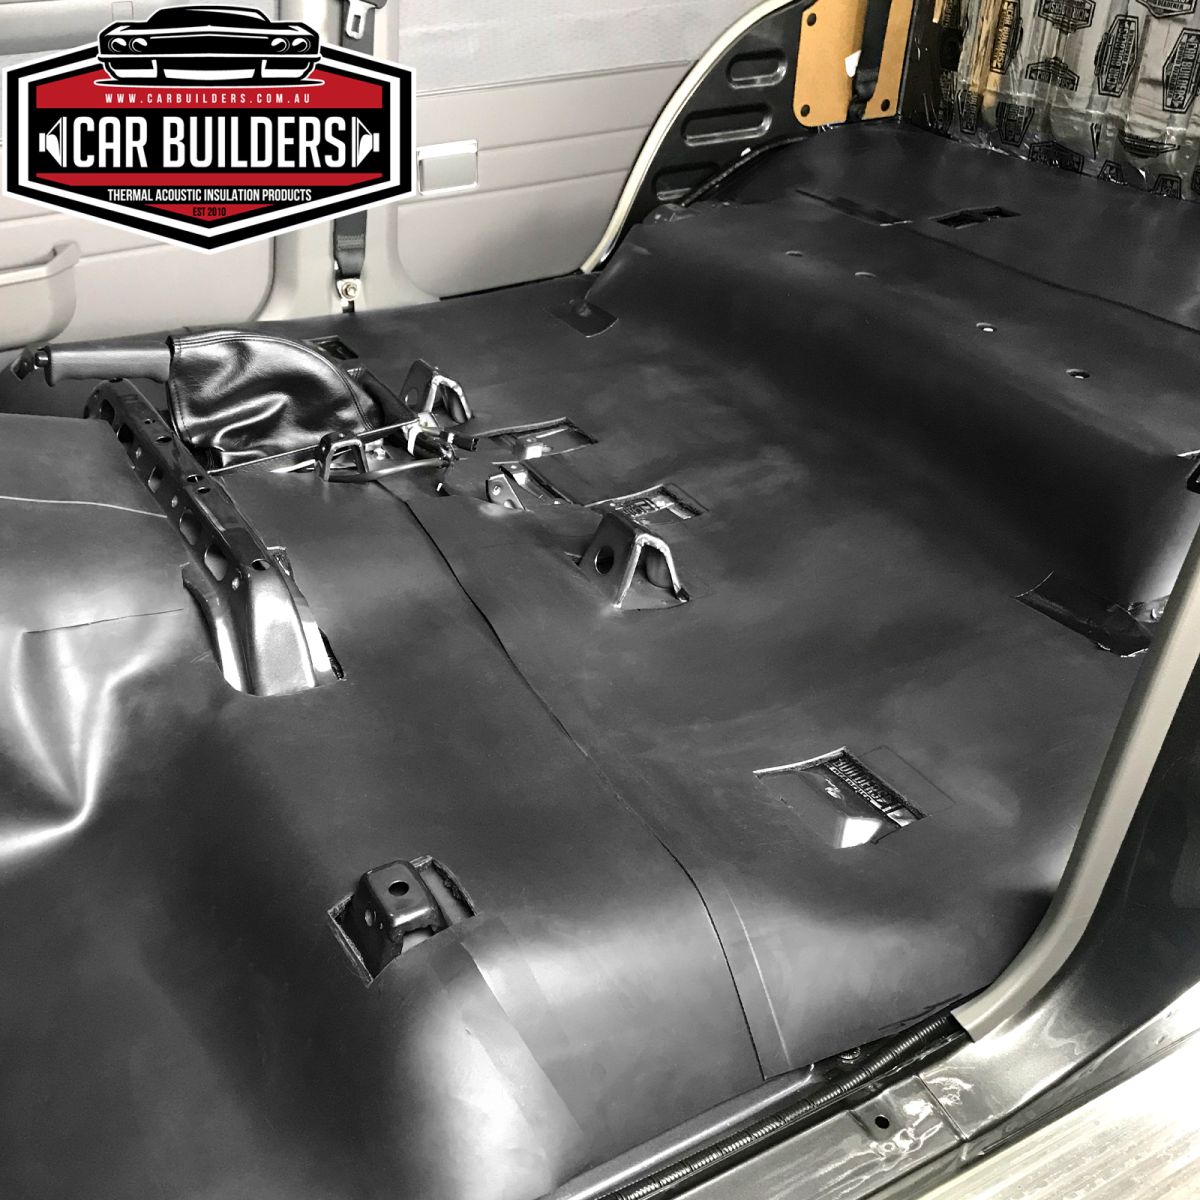
Now the floor pan. If you have a new truck you will find you have factory extruded deadening material in the footwells. You could deaden around this, however we deadener the whole area, from the top of the firewall to the rear wall, as we find that it is still quite tinny. You can expect to use almost two boxes or 3.6sqm of deadener on the floor pan. When deadening the floor pan it is important that you don’t cover grommets, mounts, seat belt points etc. We also stop the deadening just before the sides to allow room for the looms that run along the edges.

Next is the Mass Loaded Vinyl, which has a sound blocking vinyl face with a 10mm closed cell backing. It is water proof and forms a decoupling layer. This forms our premium underlay in this dual cab pack replacing the cotton jute underlay. These sheets are 1.6m x .95m with two and a half sheets included in the pack to cover the floor.
Starting in the front area, a sheet is cut down the centreline, 750mm, where they are templated then to suit the front and passenger sides. With relief cuts and cuts around all the mounts and brackets, once again stopping short enough to allow the C bracket for the loom along the side to be fitted (the YouTube clip is particularly handy for this stage of the 79 Series Pack)
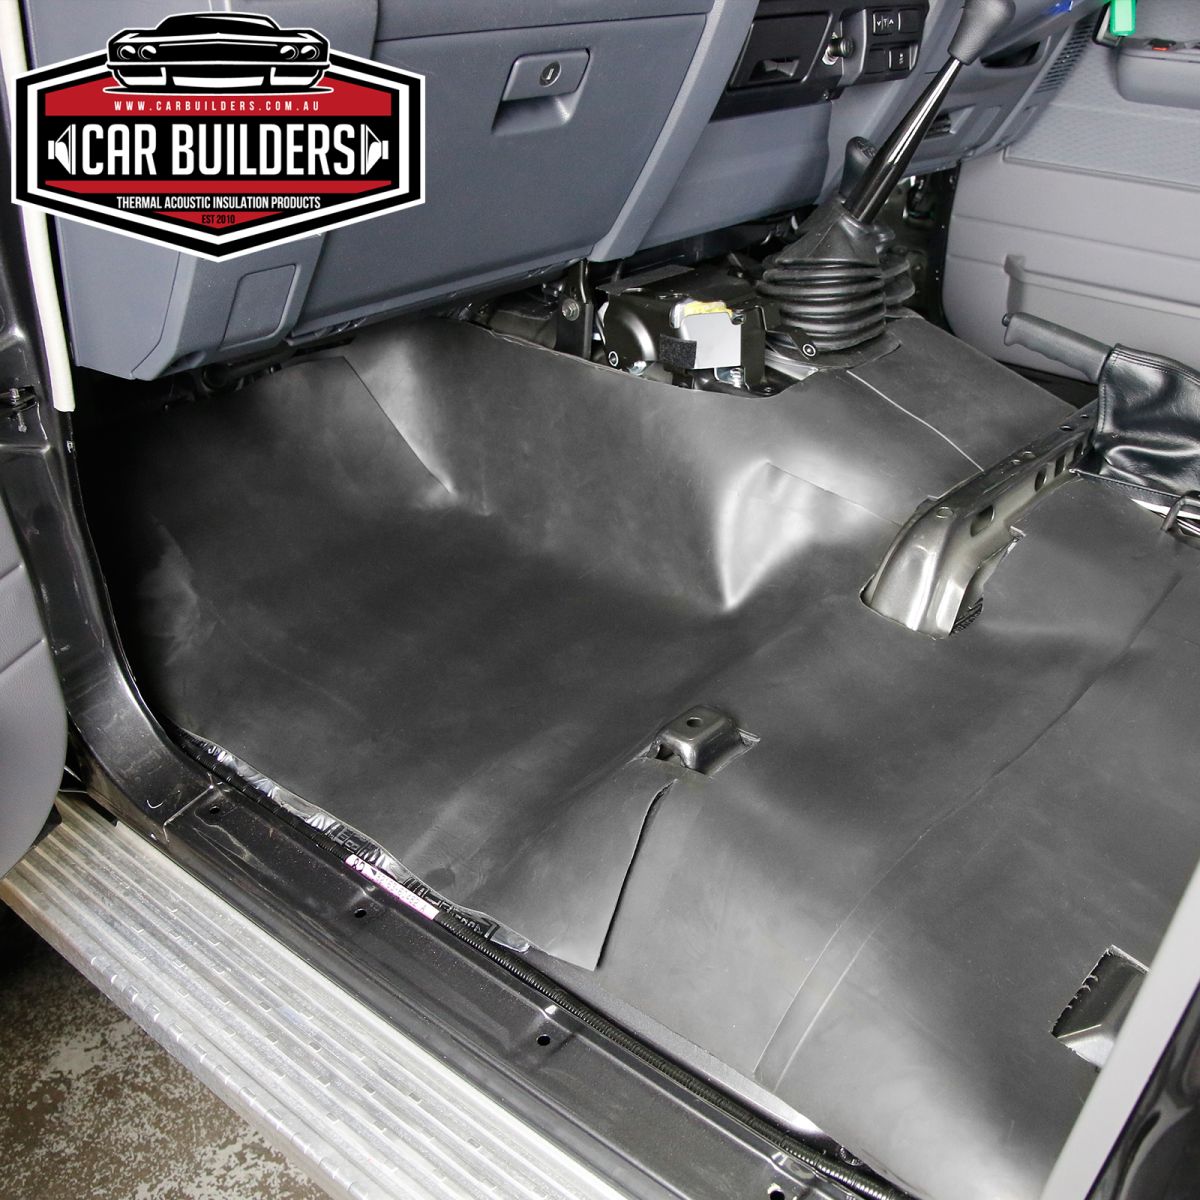
The rear full Mass Loaded Vinyl sheet then sightly overlaps the front vinyl. Care needs to be taken to make clearance for the seat belt mounts, seat bolt mounts, console clearance etc. If you have the old underlay this makes the job of templating a lot easier.
The smaller supplied sheet in this pack will cover the remaining area to the rear wall.
We will cover the rear wall with our Acoustic Liner. This will be applied to the same area as the Sound Deadener, templating around brackets and grommets. This is a peel and stick product so once it has been templated, slowly reveal the adhesive backing and stick, remembering not to pull the material, rather try to feed it into the swages.
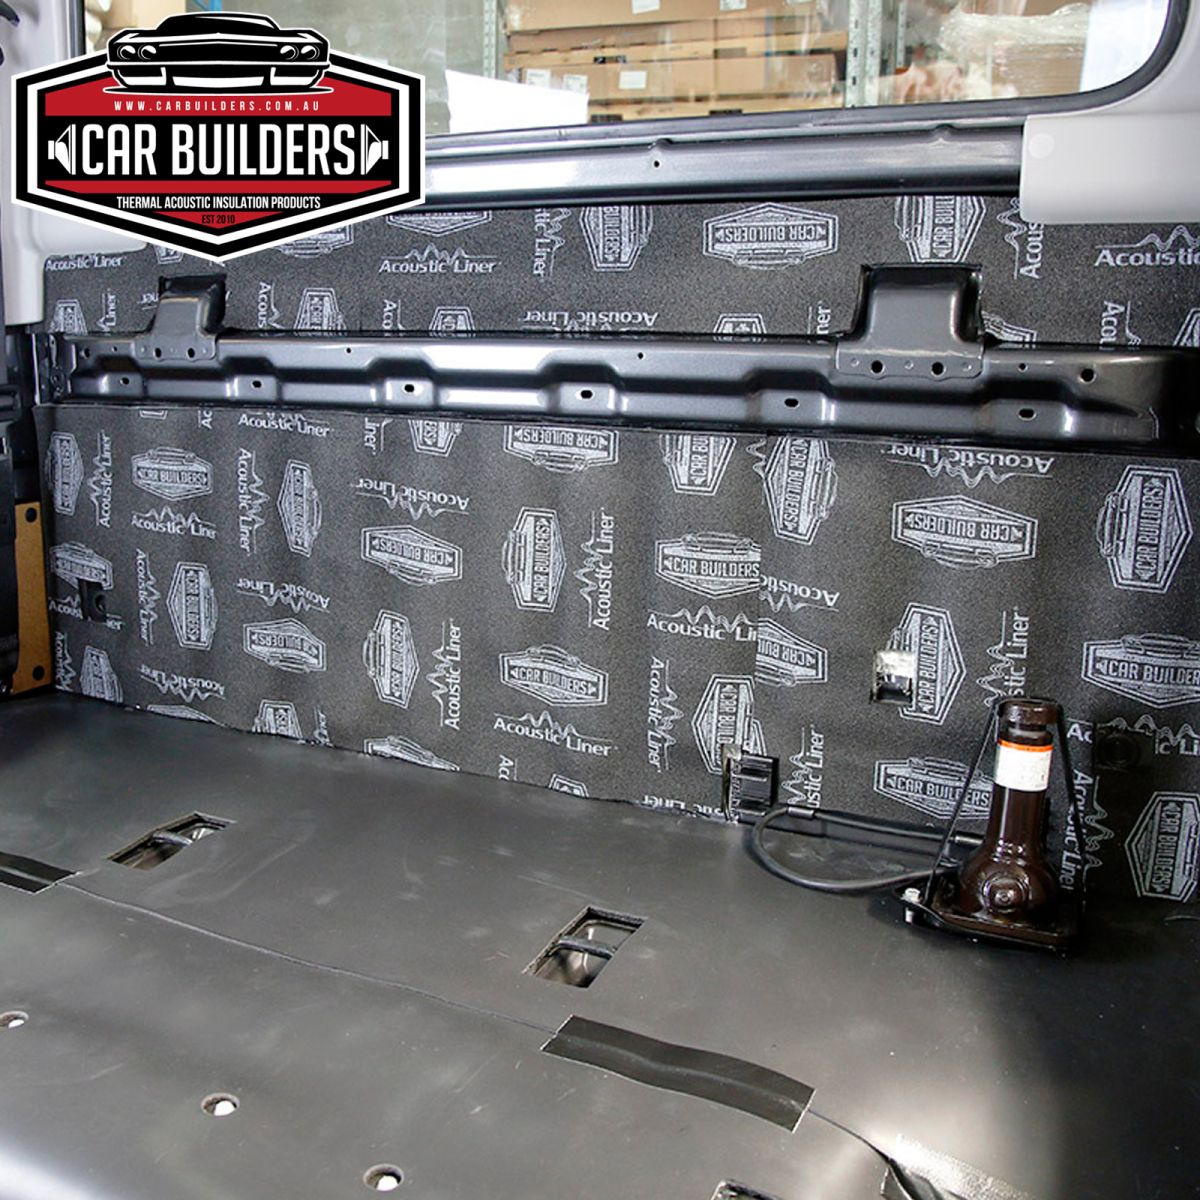
If you wanted to take this to the next level of finish, you could use on of our stretch carpets to cover it.
Now the carpet can be put back and we move onto the last stage, the doors.
Remove the door trim and the peel back the plastic waterproof membrane so that you can access the outer door skin. Again, before applying the Sound Deadener you want to ensure the surface is clean by using a wax and grease remover. You should be able to apply about two and a half sheets per door.
For detailed application of these materials in the 79 Series please watch here.